Altox-BMW-E90
Report of Our Customer on the Installation of ALTOX WBUS-5 GPS GSM Module to Control the Default Webasto Module on BMW E90

Hello everyone!
This photo report covers the upgrade and revamp of the default Webasto auxiliary heater for a BMW E90 into a full-featured starting pre-heater.I will tell you how you can change the default Webasto auxiliary heater into a full-featured starting pre-heater for BMW vehicles, in particular, for E90, with help of ALTOX WBUS-5 GPS GSM module.I tell straight that the revamp is more complicated than for vehicles of other manufacturers but the result is worth it (though there are certain aspects that need your attention).
General Information.
The control of the default Webasto heater on BMW cars has certain factors that need to be considered:1. When the car "goes to sleep" (approximately after 30-40 minutes of idle time), power is not supplied to the heater, probably to reduce the consumption. That's why in order to start the default heater, you will have to "wake up" the car or provide supply to Webasto.To wake up a BMW vehicle you can use the button in the car interior but you should keep in mind that you can imitate pushing it only once (for example, with additional relays that can get supply from ALTOX module, for example, where the auxiliary output will work in impulse mode). The first time you press the button in the closed car that is in the sleeping mode will cause the attempt to close it, and the second try will open the car. There is one more thing to consider here. You can only wake up a BMW like that only once, so when you woke it up and then it went to sleep again, then the power will not be supplied again to the heater.We will use the second method, and will just supply power to the heater via 20А fuse (the same rating as the default one) and the additional power relay for 20А, that we connect to the auxiliary output of ALTOX WBUS-5 module.2. The default method of the heater control is different for different BMW series. Some cars use CAN bus but in E90 the heater is controlled by the digital bus LIN by IHKA (climate control), this bus is also WBUS (Webasto protocol). In order not to interfere with the native control, we will connect the digital control bus for ALTOX WBUS-5 GSM module via a signal relay. That means that when we start the heater via a phone, the module will use this relay to switch the heater's bus, and upon the end of the operation it will reverse the action without interfering with the default controls.When controlling the heater via CAN bus you will have to connect the WBUS control wire directly to the heater but then you will not need an additional signal relay.3. Different series of BMW vehicles have differences in the way the coolant circulating pump is connected. In some vehicles an additional pump is controlled by the heater itself, however, in my case, in E90 the additional pump is controlled via a separate unit. The power will be supplied to the pump via a 10А fuse and a 10A power relay (I wanted to have some reserve), that we also connect to the additional output of ALTOX WBUS-5 module.Attention! There is information, that when heaters are controlled via CAN bus where the pump is controlled by the heater itself, when the heater is started via WBUs, it does not start coolant pump. In this case you need to install an additional control relay on the main circulating pump or on the auxiliary pump (you can find all diagrams and units location in WDS Online).4. BMW vehicles also have a water valve that excludes the motor control circuit from the cooling short circuit. If needed, you can supply power to this valve for the period of the heater's operation in the preoperational mode, but I did not do that.5. And the last thing: it is the need to switch off the heater early (if the operation time in the preoperational mode has not expired yet) before the start of the engine to force the controls back into the default mode. In the ALTOX WBUS-5 set there is a non-latching button with a built-in LED, we will install it in the car interior and will use it if needed to switch off the system.

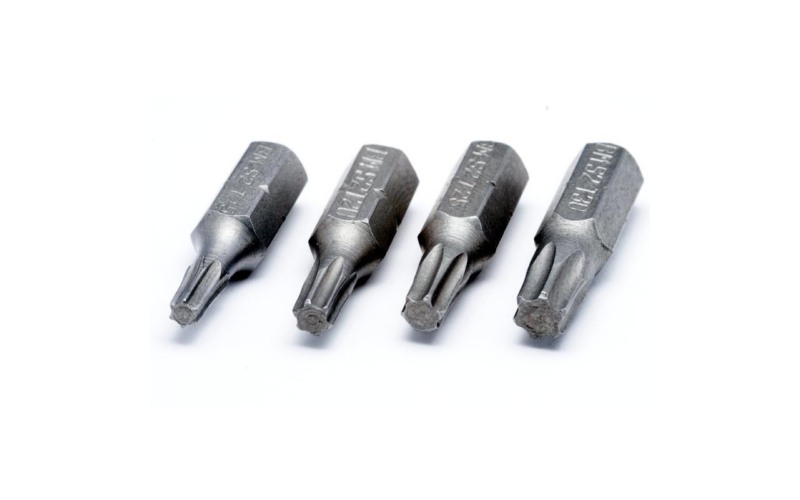
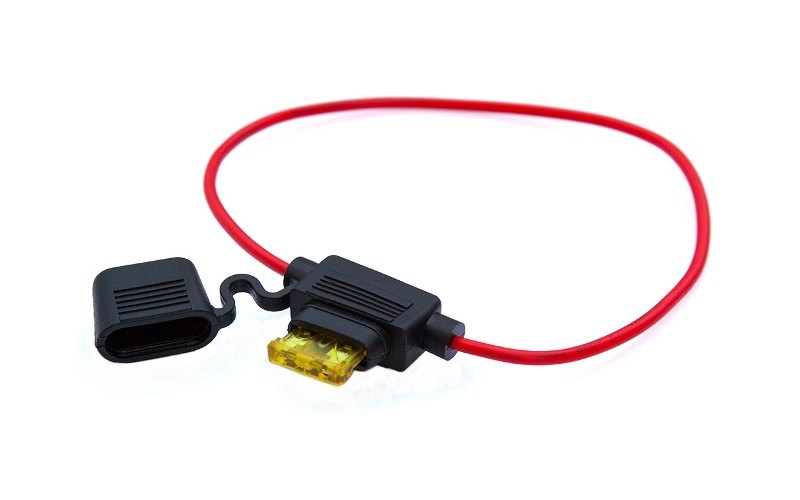
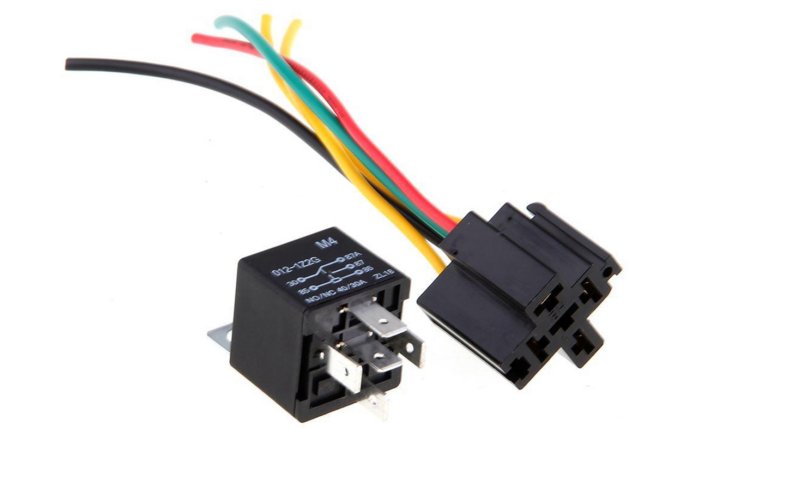
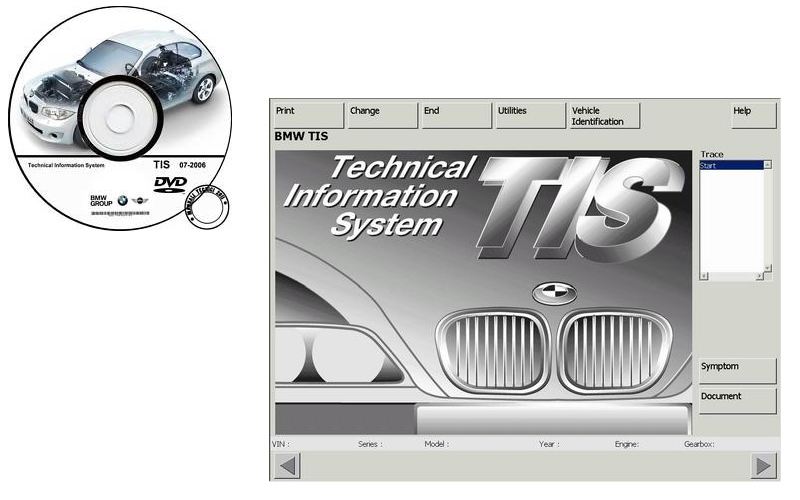
What we will need:1. ALTOX WBUS-5 GPS (you can use the version without GPS).2. Removal tool to remove plastic parts of the car interior.3. Screwdrivers set and wrenches set with Torx keys to remove panels in the car interior.4. 1А, 10А, 20А fuses.5. 10А and 20А power relays.6. Small signal relay.7. Wire with 2-2.5 sq mm cross-section, 1m length.8. Wire with 0.5 sq mm cross-section, 5m length.9. Ability to open TIS and WDS Online (via Internet Explorer), where you can find all wiring diagrams for BMW vehicles.

Installation
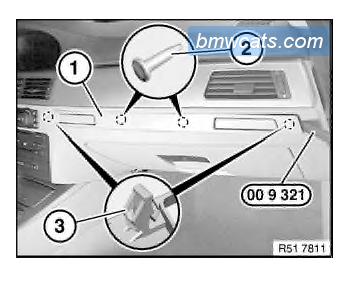
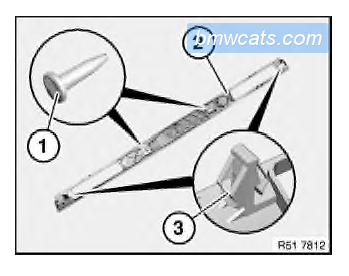
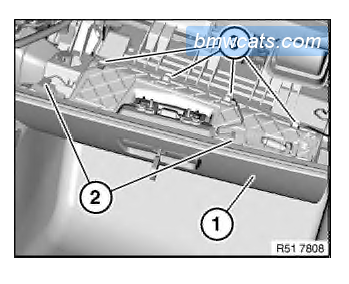
Unfortunately, I could not take photos of removing the panels. But I will try to explain everything based on the photos from TIS.First you need to carefully remove the cover (1) from the attachments (3) and plugs (2) with help of the Removal tool to remove plastic parts of the car interior.
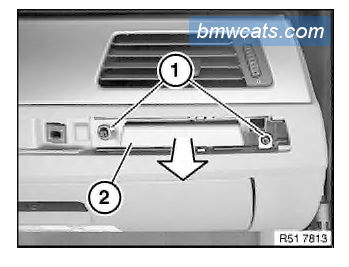
Then we remove cup holders (internal and external), unscrewing the crews (1) and taking the cup holder (2) in the direction indicated by the arrow.
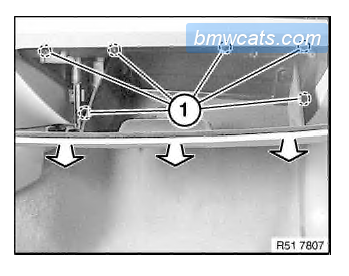
Removing the glove compartment with the housing.1. Unscrew screws (1). Pull the glove compartment.2. Disconnect the connector (2) and pill the wire from the guide (3). If needed disconnect other connectors.3. Take out the glove compartment.
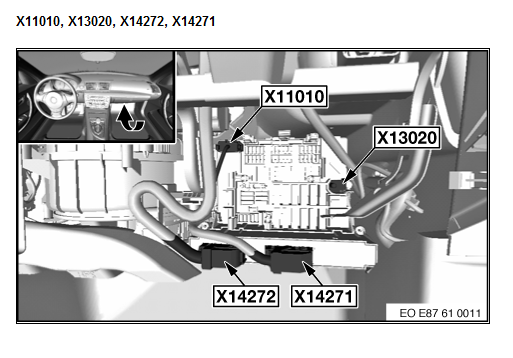
Now we need to reach the junction box with fuses.We should find connector X13020 and a thick red wire from which we will take power to supply to the heater via a 20A fuse and a 20A relay, as well as power to supply the coolant pump via a 10А fuse and a 10А relay, and the power to ALTOX WBUS-5 GSM module via 1A fuse.
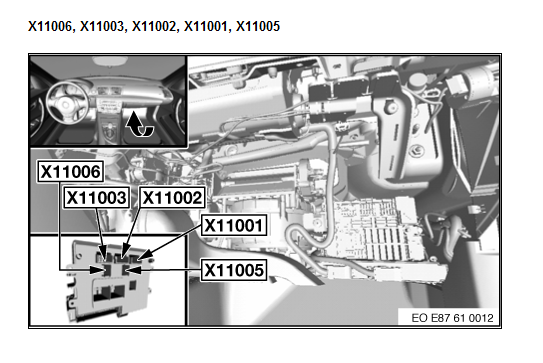
To supply power to the heater we should find connector X11002 and a red and a green wire there with a cross-section of 2.5 sq. mm. Then we supply to this wire power via our 20A fuse and 20A power relay.
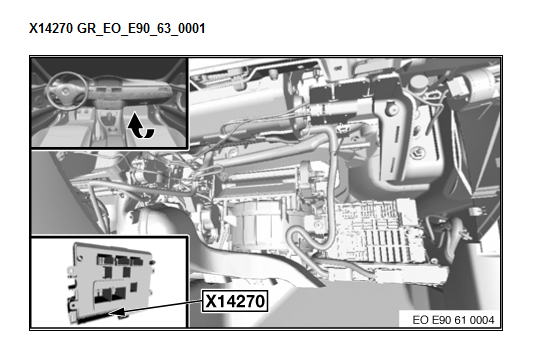
To supply power to the coolant pump we should find connector X14270 and pin 37 there - a red and grey wire with a cross-section of 0.5 sq. mm.We supply to this wire power via our 10A fuse and 10A power relay.


To connect the digital control bus you need to find connector X608 behind the climate control unit, and there find pin 11, a white and blue wire with cross-section of 0.35 sq.mm.You can also find this wire on the left under the steering head in connector X10254 where you will see pin 4, a white and blue wire with cross-section of 0.35 sq.mm.Or you can find it on the heater's connector (on the left behind the front bumper), X10131, there find pin 2, a white and blue wire with cross-section of 0.35 sq.mm.Then we connect this wire to ALTOX WBUS-5 GSM module via small signal relay.

Finally, we connect everything and program the module:1. We call the phone number of the module's SIM card and then press to start, and drop the call.The module automatically sets up the first phone number and the model of the connected Webasto heater, you receive a text message with settings.2. Then we manually set up the off delay for the auxiliary output to 1 minute for the operation of the recirculating pump after the heater is off (settingTIME3:1).Though you can do without this function.3. We set up the module to work via Internet specifying APN point of the mobile provider and then sign up in the web-based app http://altox.su/app4. Then we switch the module to the tracking mode to document all movements (setting TRACKING1).5. PROFIT!